
Hello friends,
Today I share a family favorite recipe from Aunt Mildred Bartley - Dilly Beans!
These are delicious and make a nice elegant addition to party trays and a well appreciated home made gift basket for the holidays, a step up from the usual pickles.

I process these using standard canning methods so they can
be stored longer but you can also make them in a “refrigerator” version. If you do the refrigerator version, just blanch the beans before you pack them in
the jar by submersing them in boiling water for 3 minutes them plunging them
into ice water to cool quickly. Then
proceed with the usual recipe. After you
add the hot brine and place the lids on the jars, allow it to cool a little and
refrigerate. Allow them to sit for a few
days and they are ready to enjoy. They
will last several weeks in the refrigerator.
If you want longer storage, use safe canning procedures as detailed below the recipe directions.

Beautiful dill fresh from my herb garden.


Soapsmith’s Dilly Beans
Makes 4 pints – you can easily double the recipe
4 properly cleaned pint canning jars
Canning lids and rings
Canner with rack
A jar lifter is handy if you have one
Wide mouth funnel & ladle
I use water bath canning method as described below the recipe.
Ingredients:
Fresh Green Beans (or yellow beans) about 2 pounds
4 heads of fresh dill weed
(or 4 sprigs of fresh dill weed or
4 tsp dried dill seeds)
4 cloves of garlic
1/4 cup pickling salt
2 1/2 cups white vinegar
2 1/2 cups water
1 tsp cayenne pepper (optional)
Wash the beans, snap off ends and if needed cut to fit the
jar length.
Pack each jar with beans length ways as tightly as you can
get them. If you tip the jar sideways it is easier to pack them in nicely.


Add to each jar:
1 fresh dill head, (or 1 sprig of fresh dill weed or 1 tsp
dried dill seeds)
1 garlic clove
1/8 to 1/4 tsp cayenne pepper.
(If you don’t like
the heat you can skip the cayenne, I always use the pepper)
Note: You can use any spice options you prefer - pickling spice mix, mustard seed, pepper corns etc. Just add a little to each jar to your liking.

Note: You can use any spice options you prefer - pickling spice mix, mustard seed, pepper corns etc. Just add a little to each jar to your liking.

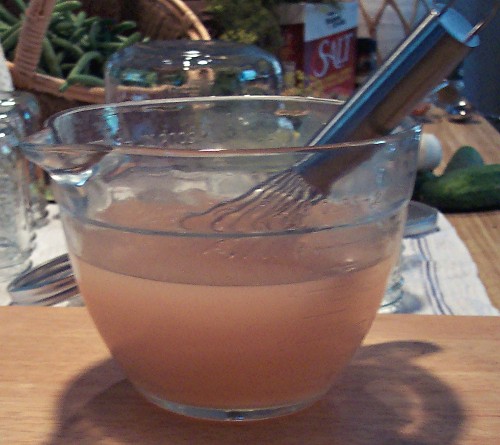
Combine the vinegar, water and salt to make the pickling
brine. Bring to a boil in a stainless steel pot and be sure the salt is dissolved. Ladle the hot brine into each jar leaving ¼
inch space at the top. If your beans are
really tight in the jar, make sure there are no bubbles of air – you might need
to move them around a little with a small silicone spatula or spoon handle to make sure there
are no air pockets.


Wipe the rims clean so you will get a good seal with the canning
lids. Follow safe canning procedures as detailed below.
Process for 10 minutes. If you use different size jars you need to adjust the processing time and also make altitude adjustments if needed (check the instructions below for more info on safe canning)

Directions for Hot
Water Bath
Fill your canner about one third full of water. Heat the water
while you are preparing your recipe. The
water needs to be hot but not boiling before you add the jars.

Wash your jars and keep warm. Jars can be washed by
hand or in the dishwasher. Keep jars hot until ready to be filled. Place the clean jars upside down in a large
skillet with 2 or 3 inches of hot water. Bring to a boil and turn off heat.
Leave the jars in the water until ready to be filled


Also warm the
canning seals in a small bowl with boiling water. Just put them in the bowl and when you are
ready to use them they are ready to go. You don’t have to keep the water
boiling as they will be sterilized in the canning process. This just warms them and rinses them so they
will make a good seal on the clean jar lip.
Prepare and pack food according to instructions in your
recipe.
Fill the hot jars leaving the recommended head space.
Wipe the rim of the jar clean with a damp towel. Place seals and rings on jars. Tighten finger tight, they
just need to be snug.
Place jars in the canner rack. The rack will keep your jars
off the bottom and will also keep them from hitting each other.

Lower the rack gently to the bottom. The jars must not sit
directly on the bottom of the canner, or touch each other as they may break
during processing. Water needs to flow around each jar. Add hot water if needed
until the jars are covered by at least 2 inches.
If you don’t have a canner, you can process jars in any pot
deep enough to have jars fully covered in boiling water. You will need to put
something under the jars to keep them off the bottom, maybe a rack or tea towel would
work. Water bath canners are the easiest to use but you can certainly improvise.
Cover and return to a full boil. Once the pot is at a full
boil you start your timing. Keep the pot boiling for the entire time required
by your particular recipe. Also keep an eye to be the water level stays above
the jars, you may need to add some boiling water if needed.
NOTE: If needed, be sure to adjust processing time according
to your altitude. This is important for
food safety!
Altitude Adjustments
for Boiling Water Bath
Altitude in Feet- Increase
processing time
1001-3000- increase 5
minutes
3001-6000- increase
10 minutes
6001-8000- increase
15 minutes
8001-10,000- increase
20 minutes


Once you processing time is reached, carefully raise the
rack and jars up and hook it on the sides of the canner. Using a jar lifter, remove the jars and set upright on counter or
table on a thick towel or rack to cool. Be sure they are in a draft free area and leave
1 to 2 inches of space in between so air can circulate. Allow the jars to cool
naturally. One of my favorite sounds is the “plink” as each jar cools and the seals are
pulled down - satisfaction.
After jars have cooled, you may press on the lid to check
the seal. The seal should be sucked down and not pop up. If you find a jar that
did not seal, put the jar in the refrigerator use the food within a few days.
.jpg)
.jpg)
Wipe the jars before storing. Some people prefer to remove the rings before
storing just in case they rust but you can decide if you want to do that. Label
the jar with the food type and date.
Store your jars in a cool, dark, dry environment.

Quick and easy sun pickle version:
I also make these using the same process as my sun pickles. Using this version means the finished jars have to be kept refrigerated as they are not preserved for shelf storage but they are just as delicious and very simple to do.
Just use the same recipe up to the point of the hot water bath canning instructions. Once you have the jars packed with the beans, spices and brine, simply close up the jars and place them in the sun for an afternoon. Then move to the refrigerator. Allow them to sit in the fridge for at least several days (a few weeks is better) to complete the pickling process. As long as you keep them in the refrigerator they will last a long time.

I hope you'll give these a try. They are really pretty simple and scrumptious, Enjoy!
Thanks for visiting,
Bonnie
Thanks for visiting,
Bonnie


No comments:
Post a Comment